Showing posts with label Nut-free. Show all posts

Tuesday, June 26, 2012

Product Review: Attune Foods Erewhon Cereal

Not too long ago I was offered the opportunity to try Attunes line of Erewhon cereal.  Their cereals are organic and made in nut free and dairy free facilities.  Both of the cereals we tried are also gluten free.   

I have never been a huge breakfast eater, especially as a kid.   My kids, on the other hand, LOVE breakfast and especially cereal.   The minute their feet hit the floor in the morning they are looking for breakfast.  One of the challenges is finding cereal they will like that is still healthy.  So far we have been pretty successful at keeping the junk cereals out of the house but they get tired of the same old thing. So we are always on the hunt for something new, tasty, and healthy.  They were just as excited as I was when our box of cereal arrived in the mail.  We got to try the Rice Twice and the Strawberry Crisp. 


Even though I have never been a huge fan of cereal, as I have gotten older I have found that there are a few types that I  really like. I have pretty high standards and won't eat just anything. Actually, I am super picky about cereal.  I don't like super sugary cereals, or ones that get soggy quickly. I want my cereal to be healthy, but to not taste like cardboard. See?  High standards.  

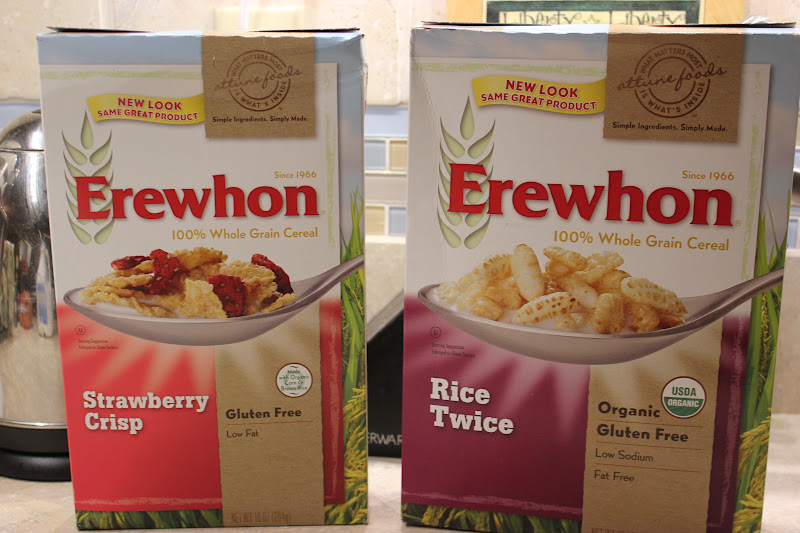
The first box opened the morning after it arrived was the Strawberry Crisp.

I was especially excited about this one because it is similar to an old favorite of mine that happens to contain dairy. (Why would corn flakes with strawberries contain dairy anyway??  That doesn't make sense to me.  But I digress...)
 My Middle One was the first to dig in to her bowl and she gave it Two Thumbs Up.  That's our rating system for food, by the way.  If something gets two thumbs, it's really good!

 We also tried the Rice Twice cereal.  We gave that one to the Littlest One.


This still sleepy little monkey also loved her bowl of cereal.

Of course I had to give it a try too, so I had a bowl of the Strawberry Crisp with  almond milk.  It was so much better than my old favorite!  The flakes stay crispier, and there are a ton of the strawberries. I seldom finish a bowl of cereal, but I certainly finished this one.  Sadly, I have already eaten the entire box.  I am still on the hunt for it at my local grocery store but have not had much luck.  As soon as I find it I will be stocking up!

 I have been wanting to make a batch of homemade granola and I had found a recipe that called for crisp rice cereal as part of the ingredients. I will be sharing that recipe soon, but I will tell you that this worked perfectly!


I will also be using the Rice Twice to make those marshmallow treats for the kids from now on. 
As a Mom, I am thrilled to find a wholesome, great tasting cereal that my kids love.  As a dairy free consumer, I am so glad there is a company out there that is catering to the needs of those with food intolerances.
For more information visit the Attunefoods website.

Wednesday, May 2, 2012

Strawberry Merlot Vinaigrette

I shared our recent Strawberry Picking trip yesterday.  We brought home about a gallon of fresh berries and lots of ideas of what to do with them all.  Since I had just gotten a new Merlot Vinegar at the Farmer's Market on Thursday, I thought that the vinegar mixed with the berries would make a great summer salad dressing.


Ingredients:
6-8 Strawberries hulled
1/4 cup Extra Virgin Olive Oil
2 Tablespoons Merlot Red Wine Vinegar (Or a red wine vinegar of your choice)
1 teaspoon honey
1 teaspoon dried basil
pinch of sea salt
fresh ground black pepper


Directions:
Put the strawberries, honey, vinegar, oil, basil, salt, and pepper in a food processor or blender.  Pulse until it is liquefied.  It's really that easy.  Add more honey if you want it sweeter.  You could use fresh basil too, I just didn't have any on hand. 


Pour over your favorite salad and enjoy!  

Those are carrots, not cheese;-)

Even my kids loved this dressing, and usually the only kind they will eat is ranch. This is definitely one that we will be making a lot this summer!


Wednesday, April 18, 2012

Vegan Stuffed Shells


Before my dairy free days one of my  favorite meals was stuffed shells. I would always order it when we ate at Italian restaurants, and after I got married I started making it at home quite often. It's been about 5 years since I last had this dish and I have really missed it. I made it last night for dinner using an old recipe but subbing tofu for ricotta and omitting the egg.  My oldest daughter, my youngest daughter, and I loved it.  My husband doesn't like tofu at all under any circumstances so it wasn't one of his favorite meals but he said it was a really good substitute for the real thing. My 5 year old... well she's 5.  And she hates spinach. But she did eat around the spinach so that's a dinner win.


Vegan Stuffed Shells:
1 package extra firm tofu, drained and pressed
1 bag frozen spinach, thawed and drained well
1 box jumbo pasta shells
Olive Oil
1 Tablespoon nutritional yeast ( to add cheese flavor)
3 cloves garlic
Basil
Thyme
Oregano
Salt and Pepper to taste
1 jar of your favorite spaghetti sauce- I used Bertolli Tomato and Basil

Directions:
 Press your tofu to get all the extra water out.  I wrap it in paper towels first then place it on a plate and put my cast iron skillet and a heavy cookbook on it.  Works like a charm!

While that is left to sit for a few minutes, cook the shells according to the directions on the box and defrost the spinach.  Make sure to squeeze as much of the water out of the spinach as you can.  When the noodles are cooked drain them and set  aside to cool a bit.

Make your "cheese" filling.  In a food processor add your tofu and pulse a couple of times.  


Add 1 tablespoon nutritional yeast, 3 cloves of garlic, 1-2 tablespoons of olive oil and process until it has a ricotta like consistency.  Add more olive oil if needed.  
Why yes, that is a box of Pops in the background.  

Add in your spices- basil, oregano, and thyme ( I love thyme and add it to so many things). Pulse to combine them.  Add in your spinach.  I added the entire bag because I happen to really love spinach.  You could add just half a bag and it would be plenty.  Last, add salt and pepper to taste. Pulse to combine all the ingredients.  Once it's the consistency you want, it's ready to go.

Coat the bottom of a large casserole dish with your pasta sauce.  Stuff each shell with about a tablespoon     ( or a little more) of the filling.  Lay them open side up in the pan.  Once they are all stuffed pour the remaining sauce over top of the shells.

Bake at 350F for about 20 minutes.


Dinner was the stuffed shells, oven roasted green beans, and a dairy free french bread, which will be included in my Friday Favorites post.  My oldest daughter had seconds, and my toddler cleaned her plate.  I guess this can be called a kid friendly meal, especially great for dairy free kids.  And it's totally vegan.  I can't wait for leftovers for lunch!


Monday, April 2, 2012

Egg Salad ~ with a Kick

I love eggs- scrambled, over easy, hard boiled, poached, baked, you get the idea.  I also happen to love egg salad but it can get a little boring unless you change things up a bit.  I recently came across a delicious avocado and egg salad recipe by Sarah at The Pajama Chef.  If you like avocados and you like egg salad, you are guaranteed to love her recipe!  I had a craving for her egg salad earlier this week but I didn't have any avocados on hand.  I did have a a few other ingredients that I had not yet tried in egg salad, so I decided to wing it and make up something new. 

Egg Salad ~  with a Kick

Ingredients:
2-3 hard boiled eggs ( depends on how hungry you are)
1 stalk celery- diced
1 tablespoon white onion very finely diced ( you can add more if you like)
A couple tablespoons mayonnaise
Sriracha- How much you add depends on how much spice you want.  


I know what you're thinking: Sriracha in egg salad? Really?? Yes!  It's delicious- trust me!  But remember-a tiny bit goes a long way!

Directions:
Mix up your egg salad the way you normally would.  Mash your eggs, add the celery and onion, add the mayo- enough to make it creamy.  Mix well to get it to the consistency you like.  Add the sriracha last; a few small drops will probably do.  I probably added about a 1/2 teaspoon to mine.  Mix well, sprinkle with salt and pepper.  
To cut down on carbs and to add some extra veggies into my day, I served mine on a bed of  organic mixed salad greens instead of on bread.  


I layered the greens in a large bowl, added the egg salad on top, then sprinkled with shredded carrots.  It was a very filling lunch.

Of course, it is also good in a crusty hoagie roll with romaine lettuce and pickles.  

This was so quick and easy to make.  You can do the eggs ahead of time and just keep in the fridge- I had cooked mine up the night before.  Since it was so filling I didn't find myself searching for a snack later in the afternoon.  This kept me going all the way to dinner, and that was with an intense workout earlier in the morning.  

What are some of your favorite egg salad add-ins?


Thursday, March 29, 2012

Easy Weeknight Dinner~Chicken Sausage Subs

During this time of year our girls have activities 5 nights a week.  Three nights a week we have a normal family dinner but the other two nights a week my oldest daughter and  husband have Lacrosse practice for an hour and a half- right at dinner time.  I need something that is easy and quick for those nights rather than ordering takeout for dinner.   During our last trip to the grocery store we came across these chicken sausages. Since they are precooked they make for a quick, easy, and very tasty dinner.

We tried a flavor totally new to us -a sweet chicken sausage made with apples and maple syrup.  
(I never thought sausage in a package looked very appetizing)
     We decided to pan fry them with peppers and onions.  Super quick, super simple.  


The only preparation required with this meal was slicing my veggies. And I did slice each sausage in half long ways so they would brown a bit easier.    


We threw some fries in the oven and baked those while the sausage and veggies were cooking.   I also toasted a couple of crusty hoagie rolls in the oven for a few minutes.


Somewhere under all those veggies is a piece of the sausage.  What can I say- I love my veggies!

I filled mine with sauteed veggies and some lettuce. It was filling, but not overly so.  I wasn't sure what to expect from the sweet sausage, but I really did like it.  It had such a mild flavor and  was not greasy at all. If you eat meat, these are a great thing to keep on hand for a quick weeknight dinner. 

We had leftovers since I cooked up the whole package so my husband used them in scrambled eggs they next morning.  They made a very tasty breakfast!  


**I was not paid for this blog post.  I just wanted to share a new dairy free find**

What is something you keep on hand for a quick dinner?


Friday, March 23, 2012

Potato-Less Potato Salad

One of my major food weaknesses is pasta salad.  I love all types of pasta salads and during the warmer months we have one with just about every meal.    My two favorites are potato salad and pasta salad.  This recipe takes the two of them and  puts them together.   It is a pasta salad made the same way you make potato salad, but with noodles instead of potatoes.  You get the same flavor, it just takes less time and less work ( no peeling and slicing of potatoes involved).  It has quickly become a staple salad in our house and one I have to share with you.

 Potato-Less Potato Salad

 Ingredients:
1 box pasta noodles of your choice. I like to use shells or elbows.
6 hard boiled eggs
3 stalks celery, diced
dill pickles, diced (optional)
mayonnaise
2 teaspoons yellow mustard
paprika
seasoned salt
 
Directions:
1. Boil  your pasta noodles according to package directions.  While pasta is cooking, hard boil your eggs as well.  

2. When the pasta is cooked to al dente, drain it, rinse it with cold water to stop the cooking process, and let cool.  

3.Once your pasta and eggs are cooled off add the pasta to a large bowl.  Chop your eggs into the size pieces you desire and add them and the celery and pickles.to the noodles. 

4. I add roughly 1/4 cup of mayo, or enough to make the salad creamy.  Add as much or as a little as you want-the same as making potato salad.

5. Add your mustard (you can omit the mustard if you like).  I add about 1-2 teaspoons.  Mix well and sprinkle with paprika,  seasoned salt, and fresh ground pepper.  


You can either serve immediately or chill for about an hour before serving.  It also makes great leftovers.  

*You can make this Gluten Free by using Gluten Free noodles.


Wednesday, February 22, 2012

Belgian Waffles

I'm not sure how this happened, but my kids are all huge fans of breakfast.  Me-not so much.  Especially when I was a kid. I guess my girls take after their Daddy in that way.  As soon as their feet hit the floor in the morning they are wanting to eat breakfast.  Their favorites include Cheerios, Life, Rice Krispies (or Kripsies as my 5 year old calls them), or Corn Pops.  They do like oatmeal, especially overnight oats.  But their favorite breakfast is Belgian waffles or pancakes with syrup.  We have tried several waffle and pancake recipes and my favorite is a very simple recipe from my Better Homes and Gardens Cookbook.
I have found that most waffle and pancake recipes call for some sort of dairy product- buttermilk, cream, sour cream, etc.  But, contrary to popular belief you do not need dairy to make a delicious, light waffle. These are crispy on the outside, fluffy on the inside. 

Belgian Waffles:

1 and 3/4 cups all purpose flour

2 tablespoons sugar ( raw cane sugar)

1 Tablespoon baking powder

1/4 teaspoon salt

2 eggs

1 and 3/4 cup vanilla soy milk

1/2 cup canola oil

1 teaspoon vanilla

1 teaspoon ground cinnamon


Directions:
Preheat your waffle maker while you are preparing the batter.

1.In a medium bowl mix together your dry ingredients: flour, sugar, baking powder, salt, and cinnamon.  Make a well in the center.

2.In another bowl add the eggs, milk, oil, and vanilla.  Mix well.  Add the wet mixture to the dry mixture and stir until moistened. 


My helper for the morning, in her brand new feetsie pajamas that she had to  have.


3. Pour 1 to 1 and 1/4 cups batter on the grids.  Follow your waffle makers directions for use.


We turn these into "dippers" for the two littlest ones. 

If I have time I will usually make a double batch so I have plenty to get through the week.  They reheat wonderfully in a toaster. They also freeze well.


And I just had to add this picture of my other little "Helper".  Bruin was so hopeful he would get a waffle too.  And of course he did.


Recipe adapted from the Better Homes and Gardens New Cook Book

Tuesday, February 21, 2012

Simply Homemade~ Beef Stew

This is one of my family's absolute favorite winter time meals and one I grew up on as a kid.  It's so easy, requires few ingredients, and the best part- it is a slow cooker meal that require no attention all day until about 30 minutes before you are ready for dinner.  It takes about 4 hours on high or 6 on low. I make this on nights we have sports, Scouts, or drama classes.  Last night I made it for my husband and daughters so they could eat while I was at my Brownie meeting.  I made a bowl for myself when I got home and it was perfect for warming me up after being out in the cold.


Ingredients:
1lb stew beef
1 medium onion diced
1 tablespoon vegetable oil
4-6 carrots, sliced
4 stalks celery, sliced
3-4 medium potatoes, chopped.  
1/4 cup flour 
water
Salt and pepper to taste
I didn't include a picture of the raw stew beef because raw stew beef is unappetizing.

Directions:
1. Heat about a tablespoon of vegetable oil in a large skillet.  Add your diced onions and your stew  beef.  Season with salt and pepper and let cook until the meat is browned on the outside and the onions are translucent.


2. While the meat and onions are browning, prepare your carrots and celery and place them in the bottom of your slow cooker.  Don't cut the potatoes- those get added later in the cooking process.

3. Once the meat is browned, cover with water.  This will help to de-glaze the pan, and to make a a broth for the stew.  Let cook until it starts to simmer.  


4. Pour the stew beef, onions, and water into the slow cooker.  Add additional water if needed to make sure all the meat and veggies are covered.  Season with additional salt and pepper.  Let cook  for 4 hours to 6 hours.

5. About 30 minutes before you are ready to eat, add in your peeled and diced potatoes.  The smaller the pieces, the faster they will cook.  Once you can break them up with a fork, they are done.  

6.  Thicken the stew by combining flour and water to make a paste and adding that to your stew.  You can make this as thick or as thin as you like.  We prefer ours thicker than soup so I usually use about a 1/4 cup flour mixed with roughly 1/2 cup water and whisked into a smooth consistency.  Make sure there are no lumps in your paste. (You could also use cornstarch instead of flour, I have  used it for this before)
  Add it to your stew and stir well.


You will need to add more salt, especially since you do not use a premade broth.  Potatoes absorb salt, and every time I make this we have to add more salt. Just be careful not to add too much.

We serve this with crusty bread and salad.  It feeds a family of 5 easily with leftovers for the next day. I can't wait for lunch today!

What is one of your favorite winter time soups?   

Thursday, February 9, 2012

Heart Shaped Crayons~ An Allergen Safe Valentine's Day Gift


Valentine's Day is next week and my daughter's preschool class is exchanging Valentines, as most classes do.  Last year we gave each child small boxes of chocolate, the year before that I think I gave out lollipops.  This year there is a child with a severe peanut allergy in the class so I have been staying away from food items. I saw the idea to make crayons a long time ago ( well before Pinterest) but never got around to doing it.  I then saw the idea on Pinterest again, and pinned it as a reminder to myself.  The pin is  pictures, not so much the directions.  They turned out fabulous and my daughter is so excited to hand them out on Tuesday. I have not yet decided how I am going to make the cards, but as soon as I do, I will add that picture to this post.

Valentine's Day Crayons:
You will need:
2 silicon baking pans with heart shapes ( I found mine at Walmart in the Valentine's section)
2 boxes generic crayons ( don't waste Crayolas on this - this generics work just as well)
1 baking tray wrapped in aluminum foil

Directions:
Preheat oven to 250F
Peel the paper off of the crayons .This was the longest and most tedious part.  Break the crayons into small pieces- small enough to fit in the baking cups.  If you can, get the kids to help.


Fill each baking cup about halfway with broken crayons. Place the baking tray on the covered cookie sheet and bake at 250F for 15-25 minutes,  or until the crayons are completely melted. (this picture is of my second batch)


Remove from the oven and let cool completely.  They will harden after about 30 minutes.


Remove from the baking cups and you're done!  It really is that easy!  1 box of 64 crayons will make 12 heart shaped crayons.

To make them into Valentine's you can tape them to handmade cards, or premade purchased Valentines.  It's your choice.  I am going to make cards for my daughter's class.

*I am also going to order number and alphabet trays from Amazon and make letter and number crayons for my 1.5 year old daughter.*

Enjoy!